The AR-15 – famous to the ones who use it. Infamous to the ones who don’t. The AR-15 design was made for military action that was converted to civilian operations by taking the select fire (full-auto/burst fire) out of the weapon. With this in mind, operating the AR-15 is quite simple. Let’s take a look on how to shoot an AR-15.
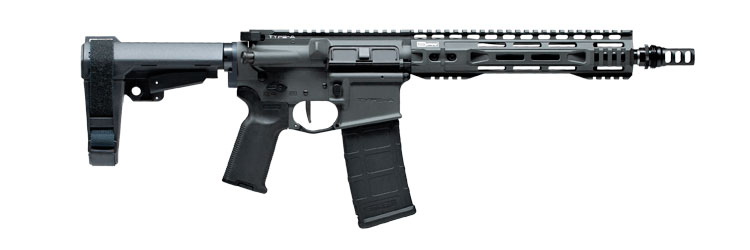
We’ll be going over how to shoot an AR-15 with the BG Defense Type-A SPR-10.5 GEN3 A3. It is a lightweight AR-15 style rifle with high accuracy and very low recoil.
Quick History
The AR-15 was made not too long after the Korean War in the late 1950s and early 1960s by a company called ArmaLite.
The AR in AR-15 stands for Armalite Rifle not Assault Rifle.
The original design and functionality came from the AR-10 also made by ArmaLite which was basically the same weapon at a higher caliber. The US contracted ArmaLite to make a smaller version of the AR-10 rifle with a select fire. From this the AR-15 was born. The US Military introduced the AR-15 in the Vietnam War designated as the M16. Since then, the M16 has had many different versions and numerous variations since it’s inception.
Firearm Overview
Before starting, it would be good to identify the main parts of the AR-15 that are necessary for firearm operation.
Check out the images below for reference:
AR-15 Breakdown


Magazine
Standard AR-15 magazines hold 30 rounds of 5.56x45mm or .223 Remington ammunition.

Bolt Release
Closes the bolt if the bolt is open – an open bolt exposes the inner gun

Trigger
Activates the firing pin which fires the round.

Safety/Select Fire
Switch which takes the firing mode from safe to fire.

Sights/Optics
Reticle device for aiming the weapon. Usually an optic or standard iron sights.

Charging Handle
Handle that loads and/or ejects a round from the magazine once pulled

Stock
Back portion of the gun that provides support when shooting

Handguard & Rails
Hides the barrel where you can hold the weapon with your front hand. Rails allows for attachments

Upper Receiver
Contains the ejection port and the bolt which houses the firing operations

Magazine Release
Button to release the magazine from the weapon
Once you have a good idea of where these important gun components are located on the weapon, you should know what is referred to in this “how-to” article.
Loading the Magazine


Standard AR-15s are chambered in 5.56x45mm (or .223) ammunition – or just 5.56 for short. We’ll start by taking an empty magazine in your off hand and grab a round in your good hand. Take the hand that has the magazine, make sure you have a good hold on it or have it seated on a table or surface, and take the round in the other hand and align the round with the top of the magazine. Push the round down in between the lip of the magazine. Once the round is in, slide it back so the back of the round is flush against the back of the magazine. This should ensure less jamming of the weapon. Repeat this process until the magazine is fully loaded.
Load the AR-15


Putting the magazine in
Once you have a fully loaded magazine, pick up the rifle by the pistol grip in your good hand. Grab the fully loaded magazine with your off hand. Make sure the ammo in the magazine is pointed in the same direction as the rifle. Insert the top of the magazine inside the magazine well of the rifle. Push it all the way in until you cannot push it anymore. Give the bottom of the magazine a tap to make sure the magazine is well seated inside the rifle.
Chambering a round
Use the Charging Handle to load a round into the firing chamber by taking two of your fingers from your off hand and pulling the charging handle back. You will notice that once you have the charging handle pulled back all the way, the bolt and the ejection port of the upper receiver will open and you should be able to see a round being chambered. Let go of the charging handle and the bolt should close as the charging handle slides back in to it’s original position.
Be careful: You now have a locked and loaded rifle
Manage the Sights

Identifying your sights
There are many different types of aiming devices that can be attached to the railing system of the AR-15 (If your rifle has a railing system) to optimize your visual when shooting your target. Usually, aiming sights come in two flavors: Iron Sights and Optics. Iron sights are usually the default aiming devices on a firearm that are usually made of metal. Optics are aiming devices that help you aim using reflector (reflex), holographic, and or telescopic sights. Today’s optics are usually battery powered which display a reflector aiming reticle to help the user aim the weapon more accurately.
For this demonstration, we are going to cover a couple of different optics
Using optics
The first thing to do is to make sure your optic is operating correctly. The optic should already be installed on the rifle. Point the AR-15 in the direction of your target for safety reasons. Make sure the optic’s viewport is open by opening up the front and the back so you can see through it. If you don’t see a reticle in the viewpoint, you might have a battery operated optic. Use the settings on your specific optic to activate the reticle for aiming. You also might need to increase or decrease the reticle opacity depending on how bright you want it.

This Vortex Optics SPARC Red Dot Sight has Increase and Decrease buttons to activate the opacity strength of the red dot reticle


The Sightmark Ultra Shot Plus QD Reflex Sight has a switch to swap the numerous reticle looks available for that optic

Telescopic sights are generally used for longer ranges and are not always powered like the CVLIFE 3-9×40 Optics R4 Reticle Crosshair Scope
This Vortex Optics SPARC Red Dot Sight has Increase and Decrease buttons to activate the opacity strength of the red dot reticle
The Sightmark Ultra Shot Plus QD Reflex Sight has a switch to swap the numerous reticle looks available for that optic
Telescopic sights are generally used for longer ranges and are not always powered like the CVLIFE 3-9×40 Optics R4 Reticle Crosshair Scope
Using Iron Sights
To prepare your iron sights, you might have to flip them up so they can be used to aim correctly. Once they are flipped up, you can look through the rear sight, which is usually a circular hole, and line up with the front sight. Make sure the top line of the front sight is in the middle of rear sight circle.

Note the simplicity of these Tacticon Armament Flip Up Iron Sights. Iron sights may not have anything fancy but are always reliable.

Using iron sights can take a lot of practice to be proficient. Using sights like the OZARK ARMAMENT Flip Up Backup Battle Sights would be a great starter set for practice.
Note the simplicity of these Tacticon Armament Flip Up Iron Sights. Iron sights may not have anything fancy but are always reliable.
Using iron sights can take a lot of practice to be proficient. Using sights like the OZARK ARMAMENT Flip Up Backup Battle Sights would be a great starter set for practice.
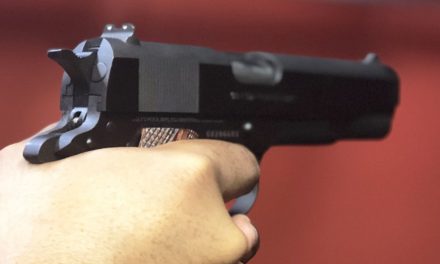
Firing the AR-15

Line up your shot
Everything on the rifle should be good to go. It’s now to get into stance for firing the AR-15. We won’t be going into the many different stances for firing but we’ll use a common stance. Fighting Stance is an extremely used and effective stance for new and advanced shooters. I recommend using this form if this is your first time shooting an AR-15.
Get into stance with your forward hand griping the front handguard and your back hand hold the pistol grip on the rifle. DO NOT PUT YOUR FINGER ON THE TRIGGER. Lean into the rifle and use the sights to line up your shot.


It’s time to shoot. Switch the safety from safe to fire with your thumb. Now it is okay to put your index finger (or whatever finger you are comfortable firing with) and pull the trigger to fire at the target lined up in your sights. You will notice that with each shot, the shell casing will eject out of the ejector port. Please note that these shell casings are hot.
Once done firing, make sure you TAKE YOUR FINGER OFF THE TRIGGER and flip the safety back to safe whether you are out of ammo or not. This is always a safe practice for an firearm and not just the AR-15. Also, make sure to never point the rifle in the direction of where you don’t want to shoot.
Reload the AR-15


Reloading
If you can no longer fire, it will most likely mean that you are out of ammo and need to reload the AR-15. If you are out of ammo, you will notice that the bolt is back and the ejection port is open. This is the case if there are no rounds in there.
To reload, use your index finger on the hand that is wrapped on the grip of the rifle and press the magazine release button which is about an inch above the trigger on the right side of the rifle. While pressing the magazine release button, use your other hand to pull out the magazine. Either put this magazine aside or away and get a new one. Refill the magazine with more ammunition if this is the only magazine you have.
Chamber a new round
Take the new fully loaded magazine and insert it into the magazine well once again. Push it up until it can’t go any further. Give the bottom a tap to secure it.
This time to chamber a new round, you will need to hit the bolt release button which is the opposite side of magazine release button on the left side of the rifle. Once you have put in the magazine, hitting the button with your thumb of the hand that put the magazine in should make things very simple and smooth with minimal effort.
Warning: Once again you now have a loaded rifle
Repeat the firing steps as often as necessary as long as you want or need to fire the weapon.
This was a basic overview on how to shoot an AR-15. Other methods on stances, attachments, cleaning and maintenance for the AR-15 will be covered in different articles. If you are brand new to firing guns, keep practicing. Many guns can be intimidating to new users so keep familiarizing yourself with new firearms so you can constantly get better. If you are looking for a tutorial to shoot a semi-auto pistol look no further.
Remember, Practice Makes Proficient.